Sunday, June 12, 2011

Weekend Warriors


Our house is always a work in progress, especially the yard.  For the most part, the yard is in order, but there was one side of the house that was just yucky.  We started our quest to fix that about 3 weeks ago.


I created this bed last summer when friends and family gave me starts of flowers to add to my garden.  Unfortunately it never got mulched and the rain this spring was fantastic for the weeds.  I forgot to take a before picture, but this is what it looked like after I dug Nick dug up all the plants I wanted to keep.  You can get an idea of what it looked like....

We've had problems with "stuff" coming up voluntarily.  My dad cut it off with a chainsaw...I cut the shoots with loppers...Nick tried to kill them with brush killer...they refused to die.  Nick finally decided  to get to the root of the problem, literally.


There were 3 of these!  Getting rid of them involved our shovel breaking, and the use of an axe.  I had to go raid my parents barn for another shovel and an axe.  If people saw me leaving the barn, they probably thought I was going off to murder someone.  Once everything was dug out, Nick tilled it all up again, and we replanted the plants we saved.


It was already a huge improvement.  Meanwhile, I put together THE coolest decoration to ever grace my front door.  Wallitsch's Nursery is my favorite place to get flowers, and the first time I went there this spring, I saw this and had to have it.
In addition to the 2 rose bushes I got on the second trip to Wallitsch's when I got my front door decor, Nick brought me home 2 more for my birthday, bringing the grand total to 12.  This weekend all the flower beds got a fresh layer of mulch, well, expect for the small section that has to wait until tomorrow because we ran out.
Some of us worked harder than others....

After the mulching, I put the copper ID tags into the rose bed, which also came from Wallitsch's.  I think this weekend(s) project is in the bag.


Wednesday, May 11, 2011

Farm Fun

It's been a rough week to say the least.  I've been working on a research proposal for my Masters degree for well over a week...the rough draft is due Saturday...I'm not even half way finished yet.  I don't get stressed out.  I never have been one to stress, but this research proposal combined with state tests for my sophomores next week, and working on all the "end of the year" stuff is about to push me over the edge.  I've woken up the past three mornings with headaches...I've been sick to my stomach...it's been bad.  Last night when I was on the verge of tears, Nick started talking about my favorite farm stories.

I didn't really think about cattle having personalities until I started dating Nick.  I changed my mind quickly.  The ones that end up being my favorites are the ones with the most personality.  Like S42...she is funny.  She's a complete pet, and she gets jealous when her calf gets more attention than she does.  About 6 weeks ago she had her calf outside in the pasture, which isn't usually allowed to happen at the Elgin farm.  So my husband and I went out to help my father-in-law bring the calf into the barn.  Nick and my father-in-law got the calf into the bucket of the tractor, and I was supposed to drive it in (although they didn't tell me that until they were both in the bucket with a wriggling calf).  While I was getting into the seat, S42 marched right up to the bucket, looked my father-in-law square in the eye, and literally about 3 inches from his face let out the biggest bawl I've ever heard from her.  She may have even stomped her foot.  I got to laughing so hard I couldn't get the tractor in gear, which just irritated my father-in-law.

My other favorite (aside for Laila, who is a stubborn as they come) is T57.  T is nosey.  She's always at the fence checking out what we're doing.  Our barn has two huge sliding doors on each end.  One opens into the barn lot, and the other opens into the allyway that leads to pens, with the bale-yard on the other side of the ally.  When the barn gets cleaned, the dirty bedding goes into a pile in the bale-yard until spring.  So we had both doors open, all gates down and Nick and I were waiting for my father-in-law to finish feeding hay to come clean out the bedding, when I saw something out of the corner of my eye.  I looked up, and T57 was sauntering through the barn like she was thinking, "Don't mind me.  I'm going going to sneak past and check it out in the barn lot."  When she saw me watching her, she stopped dead in her tracks and you could almost see her think 'well crap'.  I started toward her to turn her around and she gave a huff, and turned around and headed back to the pen to be with the other cows.  I closed the gate to keep her in the allyway and stood there with T right beside me watching every little thing that went on.  She was the first one back in the barn to check out the clean bedding.

I never would've guessed that stories about cows would be the thing that makes me laugh on days when I've barely even smiled.


Sunday, May 1, 2011

Mothers Day Barn Quilt

I have to admit, it's nice to have a project to blog about.  Between Masters degree homework, and the fact that southern Indiana has had 8 days without rain in April, there hasn't been a lot of opportunity to do much.  I did, however, take advantage of the break in the rain yesterday with the help of my husband to get started on the Mother's Day present for my Mom.  And Mom doesn't read this blog, so for those of you who know her, don't say anything about it. 

Barn quilts are big around here, and Mom's been wanting on.  I looked at some, but why buy something I can make for cheaper?  So that's exactly what I did.  My husband cut the plywood for me into a 42" x 42" square, and I sanded it down on the front so I'd have a smooth painting surface.  The sander is, by the way, the only power tool that I'm actually allowed to use.  Once the plywood was cleaned, I primed it, and gave it a couple of coats of white paint.


I found the quilt block that I wanted to paint in a book that I borrowed from my mother-in-law and used a trick I learned in Art class long ago.  I divided the plywood into 10 1/2" squares to make it easy to lay out the quilt pattern.


Basically all this pattern is was triangles, so it really wasn't too complicated to lay out.  Basic geometry skills help.


Once I got the pattern laid out, I went through and marked which triangle should be which color.


After that, it was time to paint.  If you aren't sure handed, you might want to tape off the triangles, but I refuse to use painters tape, mostly because I'm too lazy to.  Plus all those Art classes helped.  I got sample pots of paint from Lowe's to paint the triangles.  My sister suggested mixing my own, but I'm not very consistent went it comes to mixing paint colors, so I went with the sample pots.


It took a couple of coats of the light and medium blue color, but the dark blue took 3 coats.  Once all the triangles were painted, all that was left to do was get rid of the grid lines.


I painted over the lines with white paint, but if you have primer, it would be a good idea to paint it with primer first.  It took several coats to cover the pencil lines...like 10 coats, no lie.  The final step is to spray it with a clear coat of sealer to keep the paint safe.

But I'm happy with the finished product, and I'm excited to see it hanging on the barn at my parents house.


I'm posting to...

Sunday Showcase @ Under the Table and Dreaming
Motivate Me Monday @ Keeping it Simple
Make it Yours Day @ My Backyard Eden
Take A Look Tuesday @ Sugar Bee Crafts
Too Cute Tuesday @ Funky Polkadot Giraffe
Talent Tuesday @ Vintage Wanna Bee
Terrific Under Ten Tuesday @ At Home With K
Homemade Tuesdays @ Ladybug Blessings
Inspiring Creativity @ Dragonfly Designs

Tuesday, April 5, 2011

Laundry Time

This was the conversation in our house this morning when I was leaving and Nick was getting ready (since he went in late because of basketball games...must be nice...)

Nick: Do I have any clean socks?
Me: I don't know, do you?
Nick:  There's none in my drawer....
Me: Then I guess not.
Nick:  Did you wash any?
Me:  Did you tell me you needed socks washed?

Needless to say, there are several piles of laundry on the floor of the bedroom and socks in the dryer....


Saturday, April 2, 2011

Vanity Revamp

Since last week was Spring Break so I went on a mission to finish my bathroom make-over, and by the time I went back to work this past Monday, it was almost finished.  The last little project I have is to figure out what pictures I want to put in my Ikea frames.

Last Saturday, my family lost Millie, our Golden Retriever that my parents got for me and my sisters 13 years ago.  To distract myself on Sunday, I kept busy painting the vanity in the bathroom black, and now that it's done I love it.

This is what it looked like before...


Unfortunately I didn't have as good a picture as I thought.  But you can see the color of the vanity on the mirrors.  It certainly wasn't bad, but it's not exactly one I was in love with.  The door pulls were shiney silver, and the vanity was starting to look like it was 10 years old.


My husband took our mirrors down first, and they got sanded with 220 grit sandpaper and cleaned.  I just sanded the finish enough to allow the paint to stick, although I may not have sanded it quite enough...stime will tell.  I painted the mirrors and the vanity with Valspar's Dark Black Kettle paint. 

He also took off the doors, and I painted the drawers and the vanity itself.  My husband offered to let me buy new door pulls, mainly because he wanted to recycle the old ones for use in his garage.  This is what the old ones looked like, along with the wood color of the vanity.

Those are now on my husband's cabinets in the garage.  After some paint and the new door pulls, this is the end result...


And the mirrors...


And the vanity as a whole...


We're loving the new vanity, and the bathroom as a whole.  It feels much more "grown up" now, and rivals the guest bath for our favorite.

Just Something I Whipped Up @ The Girl Creative


Tuesday, March 22, 2011

Master Bath Makeover Begins

For many, Spring Break means vacations, relaxation, and fun.  For me, it means projects.  During the school year, especially now that I'm in the middle of Master's classes, I'm doing good to get dinner made and keep the house presentable.  But during Spring and Summer breaks, it's project time!  This week...the master bathroom. 

These are the before shots...


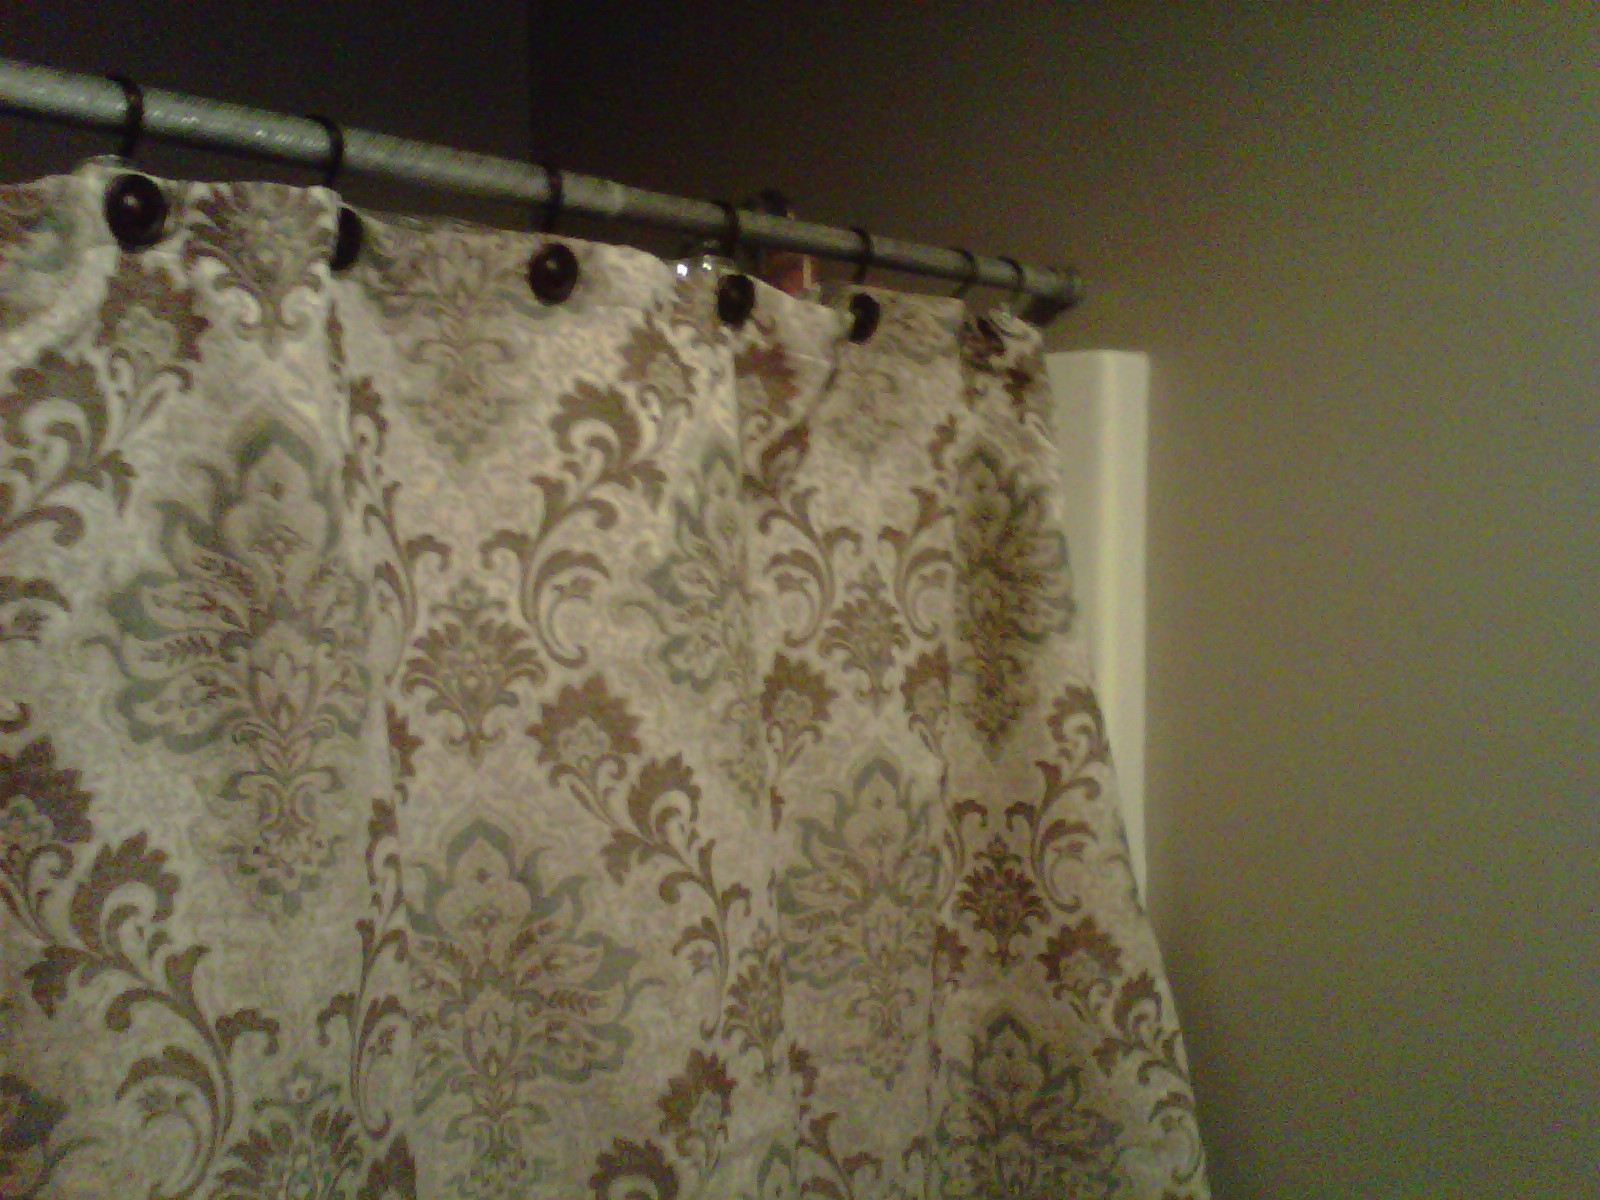
It definitely wasn't as bad as the Tiki-inspired guest bath, but I've never been in love with the striped shower curtain (especially after I accidentally dropped the toilet bowl cleaner last week and some splashed on it and bleached spots).  We registered for it when we registered for wedding gifts for lack of anything better.  I love the oiled bronze accessories, but I wasn't digging the curtain.  I found one I loved at Bed Bath and Beyond.  It wasn't quite the good deal that my Pottery Barn clearance curtain was, but a 20% off coupon sweetened the deal a little.
 
I found my paint color in the Restoration Hardware paint chip book.  I'm not above finding expensive paint colors and taking them to my local Porter paint store and getting the color copied.  In this case, it was R.H.'s Graphite.
 

The lighting in the bathroom isn't great...which is another issue we have to work on (and might have to enlist the help of my husband's bff, Dustin).

I've hung the new shower curtain, and brought the other accessories back in.  I plan on getting some frames for wall art tomorrow, and matching tp holder and towel bars at Target this weekend to finish it off.  Nick's encouraging me to paint the mirrors and vanity black.  I'd thought of doing that before I bought the shower curtain, and I think I still like that idea, so I'm thinking I'll be buying a bigger container of my cracked pepper paint this weekend as well.


I'm loving that I can reuse the accessories I already have.  I'm also loving what came out of my flower bed today...